
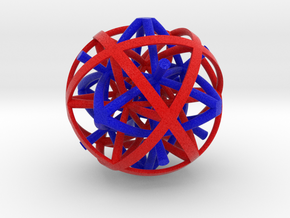
Continental drift puzzle with the three tile styles.


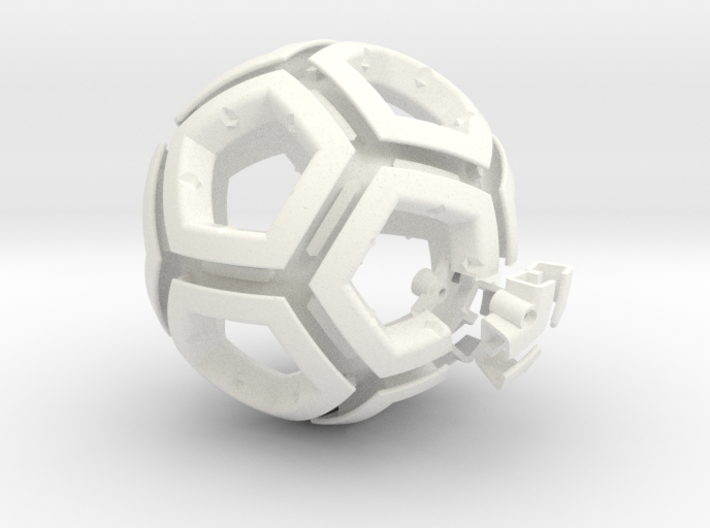
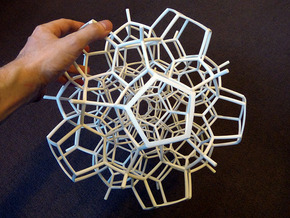
Continental drift puzzle (frame)
Print With Shapeways
 Choose Your Material
 Choose your color and finish
$108.20
Have a question about this product?
contact the designerYou must be logged in and verified to contact the designer.
Product Description
This is ONLY the frame for the continental drift puzzle.
You will need to buy a set of tiles separately!
There are three different tile styles:
See the linked pages for the post-processing needed for each kind of tile.
Together with the puzzle frame, you will need three M2 nuts and three M2 bolts, each at least 16mm long. There are slots to hold the nuts in place before inserting the bolts;
You might want to put the nuts and bolts in then secure each nut with a bit of blu tack or a similar poster-mounting putty. If you're brave, you might use a dab of superglue. Be careful not to use so much glue that it glues the bolts into the nuts, or gets into the threads of the nuts. It's fine not to use glue here - the only downside to not doing this is that the nuts might fall out of the slots when you take the bolts out later, and they are a bit fiddly to reinsert.
After securing the nuts, the next step is to glue on the pentagonal tiles (in whichever style of tile you choose). For each pentagon, put a dab of superglue in all five notches on the frame for that pentagon, then press the pentagon in. Be very careful to glue the pentagonal tiles in the correct places!
Next, unbolt and take out the removable junction from the frame, then slide the hexagonal tiles in one by one.
Finally, bolt the removable junction back into the frame, and insert the removable hexagonal tile to keep the other tiles from shifting around when you are not playing with the puzzle.
The removable junction in the frame and the removable hexagonal tile have holes for inserting optional 5mm diameter magnetic balls to keep the removable tile in place. To insert each magnet, put the part on something soft, and press the magnet into the hole, using some force.
You may want to consider dyeing the frame (and the tiles, depending on which style of tiles you get) before gluing in the pentagons. Shapeways does not offer a black dye option with their processed plastic - instead you can use a fabric dye intended for use with synthetic fabrics. I had the most success with iDye Poly black dye (do not use the "color intensifier").
You will need to buy a set of tiles separately!
There are three different tile styles:
- Colour globe tiles (requires tile bases https://shpws.me/SYyn and tile caps https://shpws.me/SYyo)
- Plain globe tiles https://shpws.me/SYym
- Flat tiles https://shpws.me/SYyh
See the linked pages for the post-processing needed for each kind of tile.
Together with the puzzle frame, you will need three M2 nuts and three M2 bolts, each at least 16mm long. There are slots to hold the nuts in place before inserting the bolts;
You might want to put the nuts and bolts in then secure each nut with a bit of blu tack or a similar poster-mounting putty. If you're brave, you might use a dab of superglue. Be careful not to use so much glue that it glues the bolts into the nuts, or gets into the threads of the nuts. It's fine not to use glue here - the only downside to not doing this is that the nuts might fall out of the slots when you take the bolts out later, and they are a bit fiddly to reinsert.
After securing the nuts, the next step is to glue on the pentagonal tiles (in whichever style of tile you choose). For each pentagon, put a dab of superglue in all five notches on the frame for that pentagon, then press the pentagon in. Be very careful to glue the pentagonal tiles in the correct places!
Next, unbolt and take out the removable junction from the frame, then slide the hexagonal tiles in one by one.
Finally, bolt the removable junction back into the frame, and insert the removable hexagonal tile to keep the other tiles from shifting around when you are not playing with the puzzle.
The removable junction in the frame and the removable hexagonal tile have holes for inserting optional 5mm diameter magnetic balls to keep the removable tile in place. To insert each magnet, put the part on something soft, and press the magnet into the hole, using some force.
You may want to consider dyeing the frame (and the tiles, depending on which style of tiles you get) before gluing in the pentagons. Shapeways does not offer a black dye option with their processed plastic - instead you can use a fabric dye intended for use with synthetic fabrics. I had the most success with iDye Poly black dye (do not use the "color intensifier").

Details
What's in the box:
continental_drift_frame_v4

Dimensions:
Success Rate:
First To try.
What's this?
Rating:
Mature audiences only.
More From This Shop
$745.84
$159.83
$1,850.75