
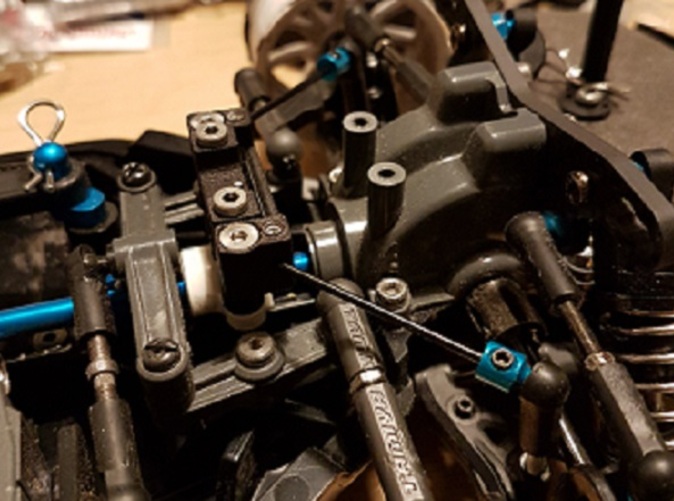
Front Sway Bar Installed with TA06 Stabilizer Set


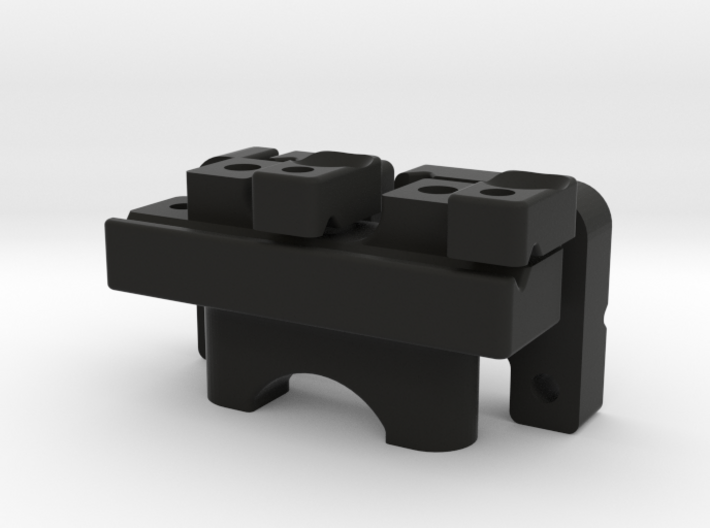
Tamiya TT02 Type S / Type SR Sway Bar Mounting Kit
Made by
Print With Shapeways
 Choose Your Material
 Choose your color and finish
$19.51
Have a question about this product?
contact the designerYou must be logged in and verified to contact the designer.
Product Description
This kit will allow you to finally fit a sway / stabilizer / anti roll bar to your TamiyaTT02 Type S or Type SR. It will work on any Tamiya TT02 modfied with TA/TRF series arms, and will work on any of the arms from TRF416 onwards right up to the latest TRF420 setup. It's also designed to interface with thercracer.com Carbon Top Deck if you have one of those.
https://www.thercracer.com/2019/06/thercracer-tamiya-tt02-carbon-top-deck.html
It will work with the following stabilizer sets:
TA06 54309
TRF418 42281
XV01 54514
FF03 (rear bar only) 54230
All will need a small amount of modification to fit on the front. The rear bars all are direct fit. Simply choose the appropriate mounting hole on your rear arms to screw the ball screws into for the dropper links.
To install you will need the following:
2 x M3 x 30 cap head screws for the front mount
2 x M3 x 16 cap head screws for the rear mount
4 x M3 x 8 countersink head screws for the bar clamps
5 x M3 x 5 grub screws for the clamps
If using the TA06 set:
2 x M3 x 25 grub screws to make the front dropper links (for the TA06 set)
If using the TRF418 set:
2 x M3 x 35 grubscrews
2 x Tamiya 5mm ball nuts (steel (9804206) or aluminium (53869 or 54360), your choice)
2 x M3 plain nuts
If using thercracer.com Carbon Top Deck, replace the M3 x 30 cap head screws with M3 x 35. You will also need 1mm spacers to fill the small gap left between the top of the mount tower and the top deck.
To prepare the parts for fitting, drill the holes for the long M3 screws with a 3.05 or 3.1mm drill bit to clean them out. Also drill out the countersunk holes in the clamps with this drill too. For the smaller holes in the clamps and the mounts which screws thread into, drill thread with a 2.5mm drill, then M3 tap halfway down the hole.
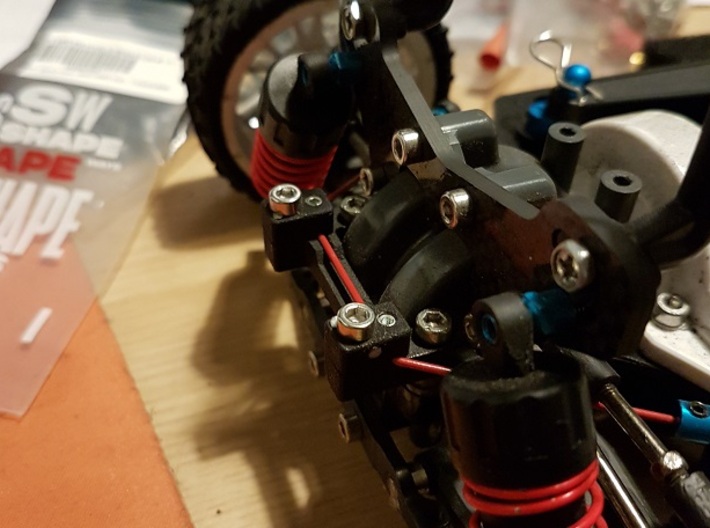
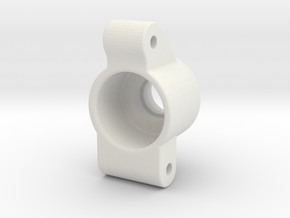
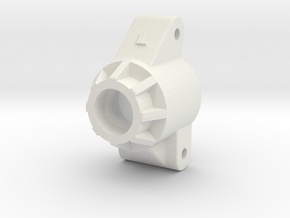
To install the front mount, remove the screws from the small saddle which retains the front propshaft bearing (D2). Place the front mount on top of D2, with the groove for the sway bar nearest the front of the car. Use the M3 x 30 cap head screws through the inboard holes on the mount and thighten then down to retain both the sway bar mount and D2.
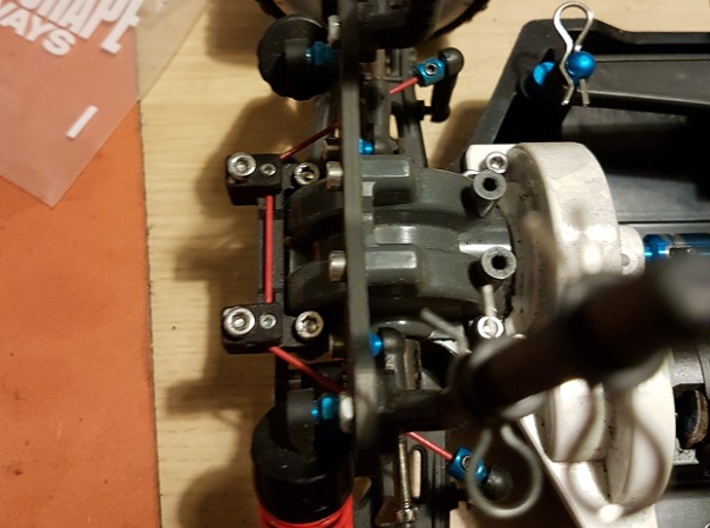
To install the rear mount, remove the rear two screws from the diff cover, place the rear mount over the holes and install using the M3 x 16 cap head screws. If installing in a new tub, remember to tap the holes in the tub with an M3 thread forming tap before installation.
The easiest stabilizer set to install are the TA06 or XV01 sets. Simply install as per the instructions, the only difference being that you use the M3 x 25 grubscrews on the front dropper links instead of the supplied short grubscrews. Set up the distance between the rod ends at 14mm. I would suggest trying the medium bar front, and soft bar rear to start with.
For the TRF418 set, install the rear as per the manual. For the front, you can't use the long ball screws for the dropper links. They are too short. To make your own, take the M3 x 35 grubscrews, screw then into the 4mm ball connector for the arms. Now spin the plain M3 nut onto the end about 8mm down. Finally, screw the ball nut onto the end until flush with the grubscrew, but without any sticking out. Now spin the plain nut back up against the ball nut and use two 5mm spanners to tighten them against eachother to prevent movement. There is a 5mm option on the free turnbuckle spanners supplied with any Tamiya turnbuckle set. Now install the front sway bar as per the manual. Again, we recommend starting medium front, soft rear and tune from there.
For the FF03 rear bar, install as per manual.
I have track tested this using the versatile plastic, so whilst there are more expensive and stronger options on the material list, the regular plastic works just fine.
https://www.thercracer.com/2019/06/thercracer-tamiya-tt02-carbon-top-deck.html
It will work with the following stabilizer sets:
TA06 54309
TRF418 42281
XV01 54514
FF03 (rear bar only) 54230
All will need a small amount of modification to fit on the front. The rear bars all are direct fit. Simply choose the appropriate mounting hole on your rear arms to screw the ball screws into for the dropper links.
To install you will need the following:
2 x M3 x 30 cap head screws for the front mount
2 x M3 x 16 cap head screws for the rear mount
4 x M3 x 8 countersink head screws for the bar clamps
5 x M3 x 5 grub screws for the clamps
If using the TA06 set:
2 x M3 x 25 grub screws to make the front dropper links (for the TA06 set)
If using the TRF418 set:
2 x M3 x 35 grubscrews
2 x Tamiya 5mm ball nuts (steel (9804206) or aluminium (53869 or 54360), your choice)
2 x M3 plain nuts
If using thercracer.com Carbon Top Deck, replace the M3 x 30 cap head screws with M3 x 35. You will also need 1mm spacers to fill the small gap left between the top of the mount tower and the top deck.
To prepare the parts for fitting, drill the holes for the long M3 screws with a 3.05 or 3.1mm drill bit to clean them out. Also drill out the countersunk holes in the clamps with this drill too. For the smaller holes in the clamps and the mounts which screws thread into, drill thread with a 2.5mm drill, then M3 tap halfway down the hole.
To install the front mount, remove the screws from the small saddle which retains the front propshaft bearing (D2). Place the front mount on top of D2, with the groove for the sway bar nearest the front of the car. Use the M3 x 30 cap head screws through the inboard holes on the mount and thighten then down to retain both the sway bar mount and D2.
To install the rear mount, remove the rear two screws from the diff cover, place the rear mount over the holes and install using the M3 x 16 cap head screws. If installing in a new tub, remember to tap the holes in the tub with an M3 thread forming tap before installation.
The easiest stabilizer set to install are the TA06 or XV01 sets. Simply install as per the instructions, the only difference being that you use the M3 x 25 grubscrews on the front dropper links instead of the supplied short grubscrews. Set up the distance between the rod ends at 14mm. I would suggest trying the medium bar front, and soft bar rear to start with.
For the TRF418 set, install the rear as per the manual. For the front, you can't use the long ball screws for the dropper links. They are too short. To make your own, take the M3 x 35 grubscrews, screw then into the 4mm ball connector for the arms. Now spin the plain M3 nut onto the end about 8mm down. Finally, screw the ball nut onto the end until flush with the grubscrew, but without any sticking out. Now spin the plain nut back up against the ball nut and use two 5mm spanners to tighten them against eachother to prevent movement. There is a 5mm option on the free turnbuckle spanners supplied with any Tamiya turnbuckle set. Now install the front sway bar as per the manual. Again, we recommend starting medium front, soft rear and tune from there.
For the FF03 rear bar, install as per manual.
I have track tested this using the versatile plastic, so whilst there are more expensive and stronger options on the material list, the regular plastic works just fine.
Details
What's in the box:
TT02 Sway Bar Set V4 Front V2 Rear For Printing
Dimensions:
Success Rate:
First To try.
What's this?
Rating:
Mature audiences only.

