


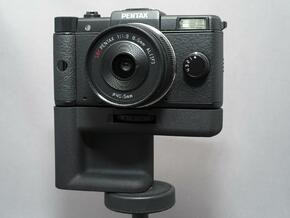
Grip for PENTAX Q
Made by
Print With Shapeways
 Choose Your Material
 Choose your color and finish
$69.36
Have a question about this product?
contact the designerYou must be logged in and verified to contact the designer.
Product Description
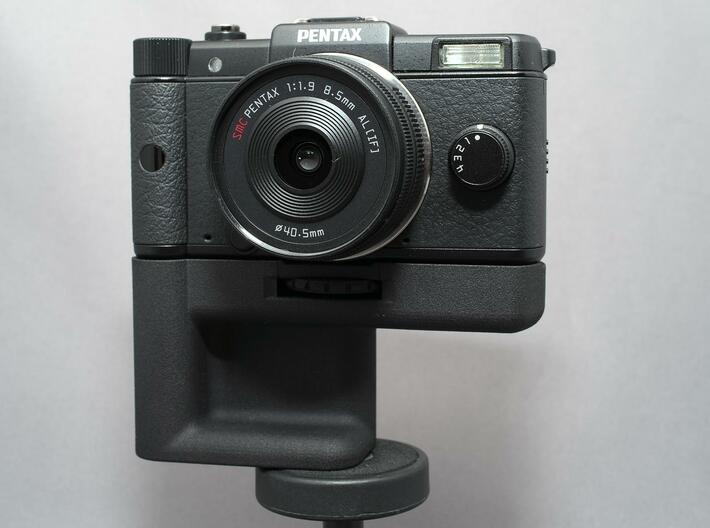
This grip improves the holding feeling of PENTAX Q, and respects 'Auto110 winder'
To install the grip, tighten the tripod screw on the bottom of the camera.
Additional tripod screw is equipped on the bottom of the grip.
It is an assembly kit. The following items are also required.
and, you need some tools to assemble it.
Assembly manual (More photos in Twitter's moment)
*Note
Only applicable for PENTAX Q. Sorry, not applicable for PENTAX Q10/Q7/Q-S1.
Clean up plastic powder before using.
By tolerance etc., you may feel tight when you attach the grip to your camera.
Don't screw tight with your force. Tighten and loosen little by little, finally, you can install!
Don't forget 'AT YOUR OWN RISK'
To install the grip, tighten the tripod screw on the bottom of the camera.
Additional tripod screw is equipped on the bottom of the grip.
It is an assembly kit. The following items are also required.
- M2 x 7 mm screw ... 5 pcs.
- M2 nut ... 5 pcs.
and, you need some tools to assemble it.
- Screwdriver
- Nippers
- Cutter
- Tweezers
Assembly manual (More photos in Twitter's moment)
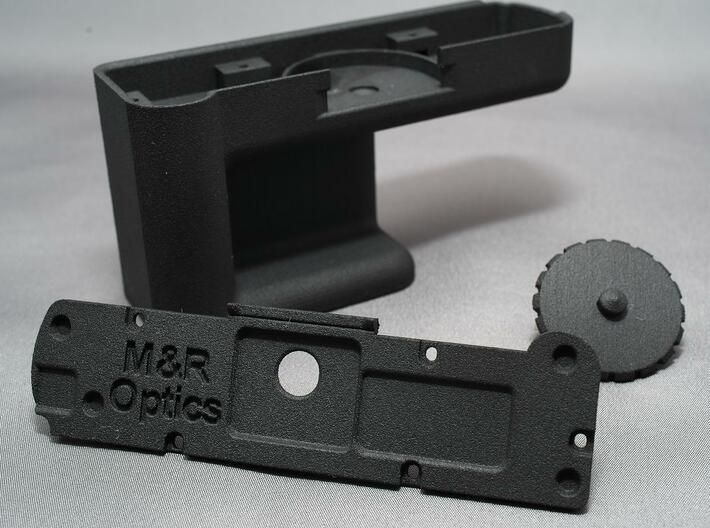
- Grip, grip cap, and fixing screw are connected with 'bar'. Cut the bar by nippers.
- Install M2 nuts into the top of the grip (5 places). Tweezers will help you.
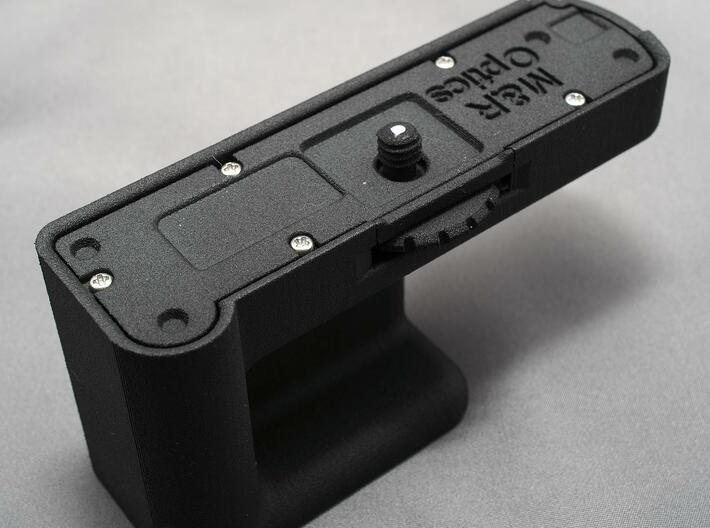
- Set the fixing screw into the specified place on the grip.
- Install the grip cap into the top of the grip. With M2 screws, fix the grip cap to the grip (5 places).
- After checking that the screw heads does not hit the bottom surface of your camera, install the grip by tightening the fixing screw completely.
*Note
Only applicable for PENTAX Q. Sorry, not applicable for PENTAX Q10/Q7/Q-S1.
Clean up plastic powder before using.
By tolerance etc., you may feel tight when you attach the grip to your camera.
Don't screw tight with your force. Tighten and loosen little by little, finally, you can install!
Don't forget 'AT YOUR OWN RISK'
Details
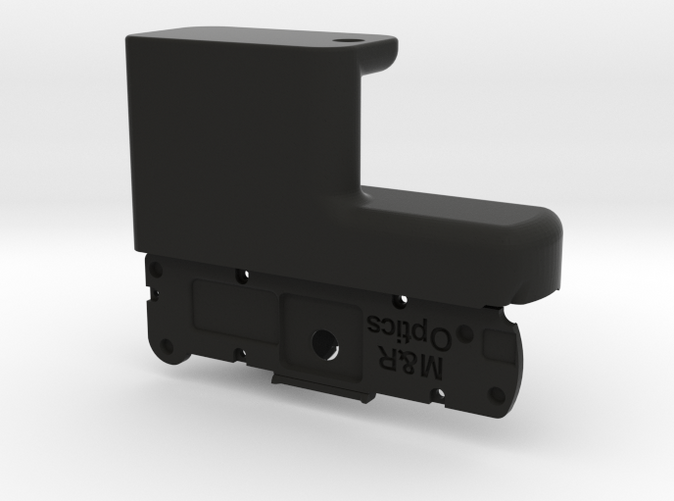
What's in the box:
PENTAXQ_Grip110_Base_B2CS18SnSCn_V6
Dimensions:
Success Rate:
First To try.
What's this?
Rating:
Mature audiences only.
More From This Shop
$7.36
$14.46