
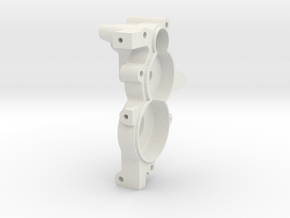
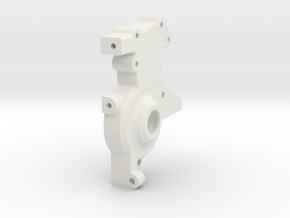
3 deg Toe In Uprights for Tamiya Thundershot

Thunder Dragon 3 Deg Toe In Rear Uprights
Made by
Print With Shapeways
 Choose Your Material
 Choose your color and finish
$21.14
Have a question about this product?
contact the designerYou must be logged in and verified to contact the designer.
Product Description
Upgrade rear uprights for the Tamiya Thundershot Chassis buggies, Thundershot, Thunder Dragon, Terra Scorcher, Fire Dragon, vintage and re-release.
Replaces the kit rear upright which has no adjustment or toe in. 3 degree toe in is the setting used on most race cars. Allows the chassis to put power down much earlier and more cleanly coming out of a corner.
The adjustment is in the form of three holes for the top camber link which allows the use of lower top arms on. This gives the rear end more grip and more progressive feel compared to the rather short kits arms.
To install, clean out the shoulders of the bearing bores with a scalpal or XACTO knife. Press the 1150 bearings into the upright and then you are ready to install. There are 2 x 1150 bearings per upright. If they are a tight fit, use the axle end as a drift to tap them in, or use the wheel hex without the cross pin and the wheel nut to press them in.
Drill the pivot and adjuster holes with a 3.1mm drill to clean them out.
This is not compatible with the kit plastic top arms. You must replace these with camber links. There is no dedicated kit, although the Terra Scorcher comes fitted with these items. To make your own top camber links you need the following:
Tamiya 50591 5mm Ball Collar
Tamiya 50596 5mm rod adjuster set
2 x M3 x 20 screws
2 x M3 nuts
3 x 38mm turnbuckles (long arm setting)
3 x 32mm turnbuckles (short arm setting)
Or make your arms cutting M3 threaded rod to length. This makes adjustment harder, but are much cheaper.
M3 washers to space out the ball collar on the inboard end screwpin.
Make up your arms using rod adjuster ends on each end of the two turnbuckles or threaded rod. Press the ball collars into end rod end. Remove the upper plastic kit arms. Reinstall the inboard screwpins using the M3 washers as required to space out to the ball collar. If you have some internal CVA shock spacers left on a sprue, these are really good for this. Once the arms are installed on the inner end, and the upright is installed on the outside end with driveshaft installed, run the M3 x 20 screw through the desired top hole, thread through the ball collar and tighten the M3 nut down. Adjust the length of the camber link to give you around 3 deg negative camber to start with. The inner hole is similar to the kit position, with the two holes further out giving progressively more grip and roll.
Details
What's in the box:
Thunder Dragon Rear Upright Left 3 deg toe V5

Dimensions:
Success Rate:
First To try.
What's this?
Rating:
Mature audiences only.


