


Crankable Sprocket Contraption for MTG Unstable
Made by
Print With Shapeways
 Choose Your Material
 Choose your color and finish
$15.85
Have a question about this product?
contact the designerYou must be logged in and verified to contact the designer.
Product Description
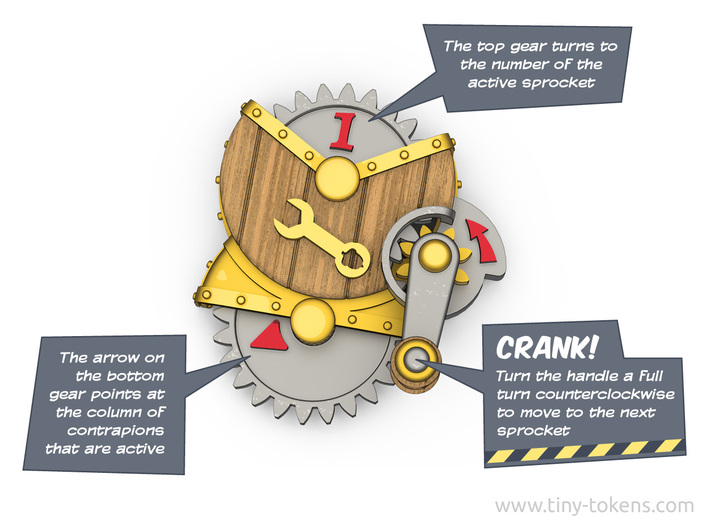
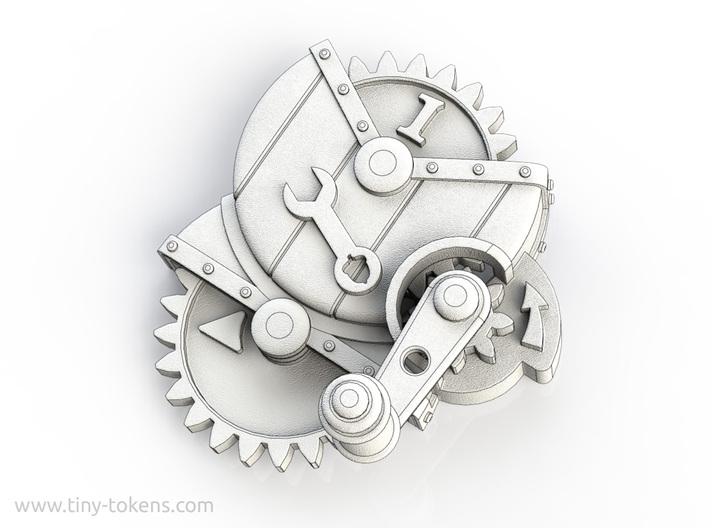
Crank your contraptions to the next sprocket by cranking the sprockets of this contraption!
This little gizmo helps you keep track of which of your contraptions is currently active. Just crank it once at the start of each turn to move the counter to the next sprocket. Each full turn of the crank handle moves the numbered sprocket at the top to the next position, and moves the arrow on the bottom sprocket so that is points at your three collumns with contraptions in turn.
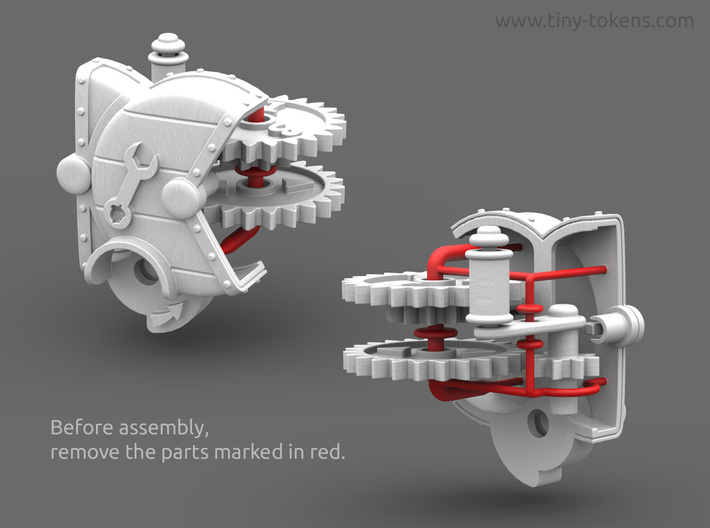
Preparation for assembly
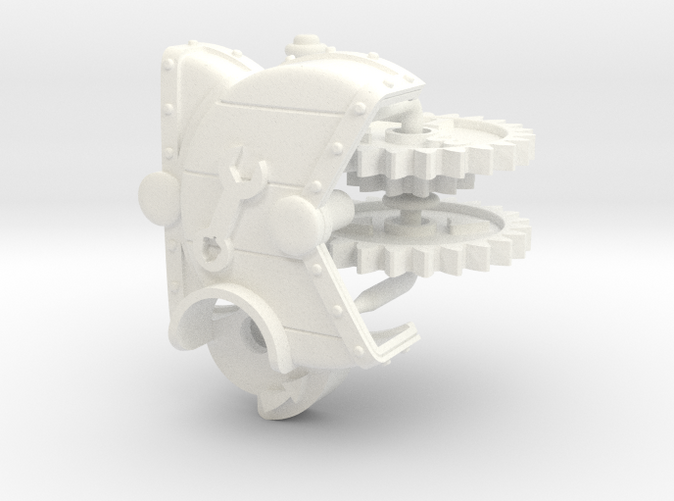
This print requires some (simple) assembly. It comes printed as a single part, with the gears attached to the main body by a wire cage. Before construction remove the cage by snipping it off of the back of the main body with a pair of scissors or clippers. The parts to remove have been marked with red in the image above. Make sure you cut the stubs where the cage was attached to the main body off as close to the main body as possible. Ideally there should be no protrusions from the body anymore where the cage was attached.
After you cut away the cage, you should be left with the four separate pieces that make up this contraption: the main body with the Unstable wrench on the front, one double gear with the numbers 1 to 3 on the front, one single gear with two arrows on it, and a crank handle attached to a smaller single gear. The cilindrical grip of the handle should be able to turn freely on its little axle. It is however likely that there is some loose nylon powder, left over from the printing process, stuck between the grip and the axle. To loosen it up, gently try moving the grip back and forth on its axle and knock or blow out the loose nylon powder.
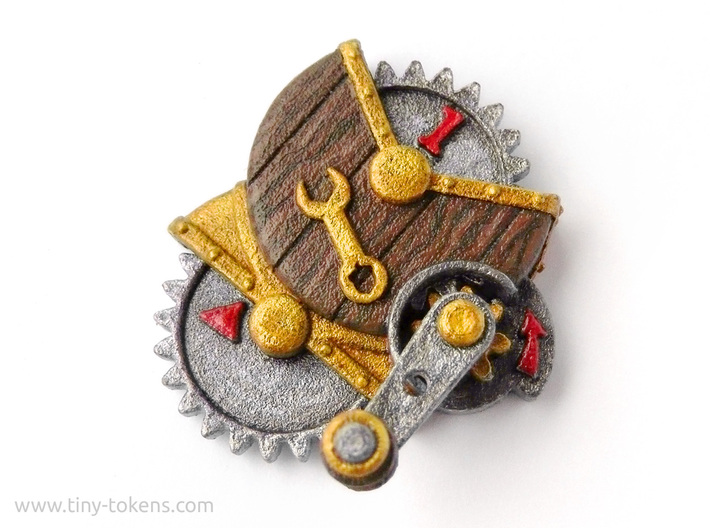
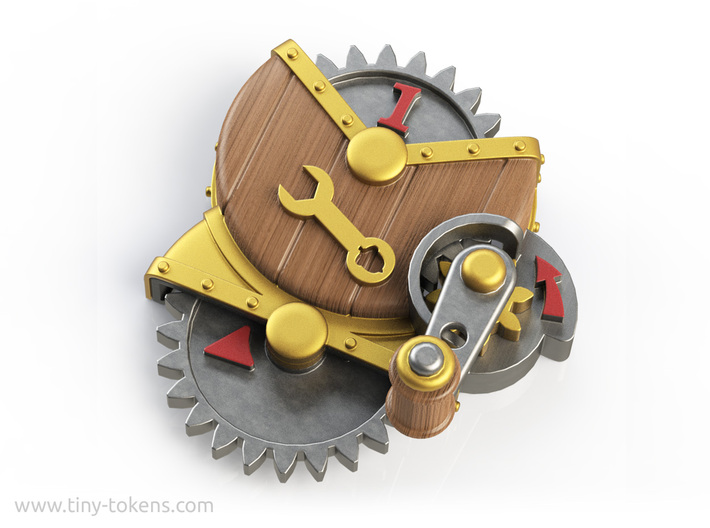
Painting
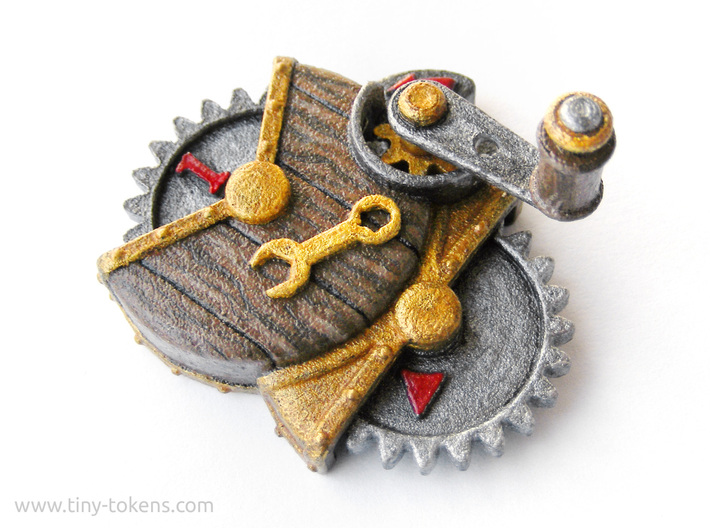
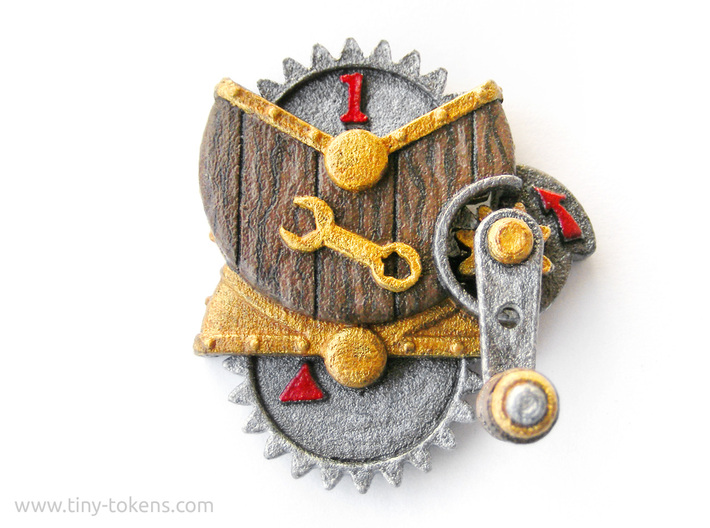
This model is printed in strong and flexible nylon. The default color is white, but you can also get it pre-painted in a single uniform color. Once you have the four parts separated and ready to assemble, this is the best time to paint your model if you so desire. The model in the pictures aboe was painted with simple acrylic paints that can be found in any hobby or crafts shop. The nylon in which this model is printed is somewhat porous and takes the paint easily. I painted mine completely black first and only after the first layer of black had dried, did I apply the other colors. This way I made sure that no spots of white were visible anymore.
Assembly
This little gizmo helps you keep track of which of your contraptions is currently active. Just crank it once at the start of each turn to move the counter to the next sprocket. Each full turn of the crank handle moves the numbered sprocket at the top to the next position, and moves the arrow on the bottom sprocket so that is points at your three collumns with contraptions in turn.
Preparation for assembly
This print requires some (simple) assembly. It comes printed as a single part, with the gears attached to the main body by a wire cage. Before construction remove the cage by snipping it off of the back of the main body with a pair of scissors or clippers. The parts to remove have been marked with red in the image above. Make sure you cut the stubs where the cage was attached to the main body off as close to the main body as possible. Ideally there should be no protrusions from the body anymore where the cage was attached.
After you cut away the cage, you should be left with the four separate pieces that make up this contraption: the main body with the Unstable wrench on the front, one double gear with the numbers 1 to 3 on the front, one single gear with two arrows on it, and a crank handle attached to a smaller single gear. The cilindrical grip of the handle should be able to turn freely on its little axle. It is however likely that there is some loose nylon powder, left over from the printing process, stuck between the grip and the axle. To loosen it up, gently try moving the grip back and forth on its axle and knock or blow out the loose nylon powder.
Painting
This model is printed in strong and flexible nylon. The default color is white, but you can also get it pre-painted in a single uniform color. Once you have the four parts separated and ready to assemble, this is the best time to paint your model if you so desire. The model in the pictures aboe was painted with simple acrylic paints that can be found in any hobby or crafts shop. The nylon in which this model is printed is somewhat porous and takes the paint easily. I painted mine completely black first and only after the first layer of black had dried, did I apply the other colors. This way I made sure that no spots of white were visible anymore.
Assembly
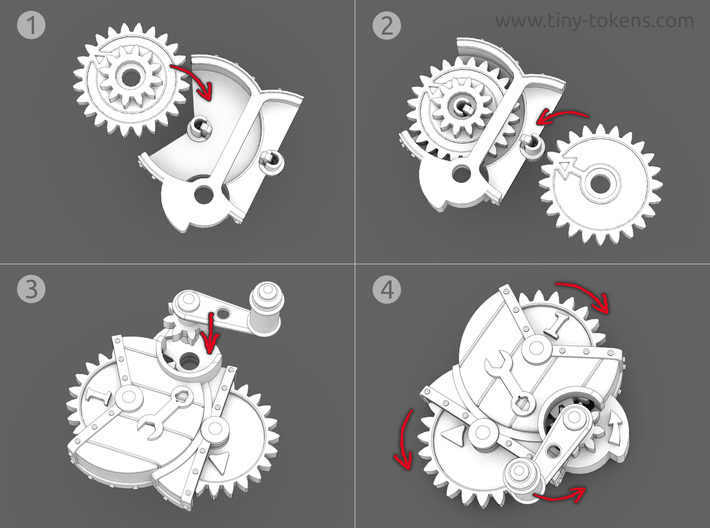
- Put the main body up side down in front of you. First place the gear with the numbers one to three on its front side over the little axle. Make sure that the numbers are visible from the front of the body, and make sure that the little arrow on the back of the gear points up.
- Place the gear that has the two arrows on its front on the bottom axle. Again, make sure that the side with the two arrows is to the front of the body, and that teh small arrow on the back of the gear points up. This way the two gears align properly when you turn them.
- Turn the main body with the two attached gears at the back over, so that the front is facing you. If you attached the gears correctly you should now see the number one on the top gear, and the arrow on the bottom gear pointing to the down-left corner. Now insert the axle of the crank handle in the hole on the right side of the main body, and push it down untill it clicks into place. Make sure that while you do this the handle of the crank points down towards you.
- Your contraption should now be complete and you should be able to turn the handle to move the gears.
Details
What's in the box:
CrankToken_v02_Assembly01
Dimensions:
Success Rate:
First To try.
What's this?
Rating:
Mature audiences only.
