
Product Description
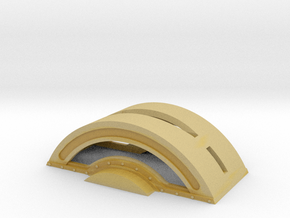
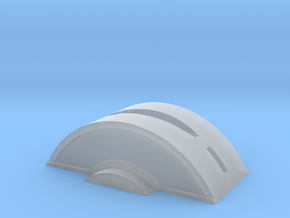
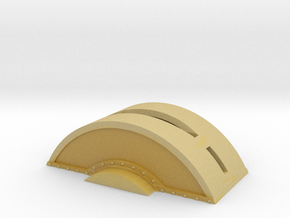
LB&SCR E2 - Body (WSF) in 4mm / 1/76 scale
(A much cheaper versions is available in a high quality resin very similar to FUD/SFDP by emailing sparkshot082@gmail.com printed on a Photon for £48.89 plus postage.)
For White/Black Strong Flexible (WSF/BSF) only. A finer, scrisper and smoother version in Frosted Ultra Detail (FUD)is also available.
Smokebox dart had to be removed yet a turned brass one would be the best option anyway.
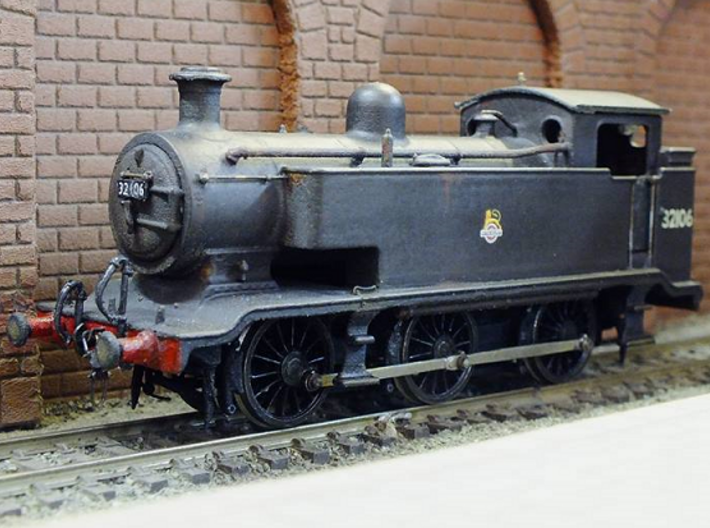
The example photograph has been built using this WSF LB&SCR E2 body, the 00 chassis and the brass coupling rods all available from this shop. Motor, wheels, gearbox etc. can be found using the links at the bottom of this page.
This is a 4mm scale model of the London, Brighton & South Coast Railway (LB&SCR) E2 Locomotive with extended tanks.
The main motivation for the creation of the SCC E2's was to correct the errors and compromises made by previous manufacturers; as a result these freshly designed and E2's are not shortened, the running plate curves are not over the top and they have the correct wheelbase.
Spectacle plates have been added as an optional extra. If you don't want them simply cut them off and file smooth - easy.
Please note - the prototype photographs sometimes showed the Smoke-Box to have rivets and other times none at all. For this reason this model has been designed as the smooth type to print better and provide a better canvas. Rivets can be added by buying transfer decals that have physical relief. DCC Concepts is one manufacturer that supplies them.
Also to be noted, the rivets on the side of the tank don't always turn out perfectly in WSF/BSF, especially after sanding down. Adding transfer rivet decals will solve this easily.
BODY INSTRUCTIONS: The Smoke-Box Door is located on a sprue in front of the body and the 2 slide in cab doors are sprued under the cab. These slide in from the top and are removable, the cab roof is provided loose. This allows you to easily paint the interior and add a crew. . The buffers are sprue joined underneath also, this gives you the choice of using them or substituting them with metal ones from other manufacturers without having to hack them off a buffer beam.
If you use the supplied buffers please note that the buffer bases and buffer heads are slightly thicker than they should be due to printing tolerances so filing them back will bring it back to scale length. The round sprues at the rear of the buffers also double as pins to locate to the holes in the buffer beam.
The optional Boiler Injector Pipe is located loose and is usualy to be joined to the left hand side of the locomotive if you are to use it. Refer to prototype photographs.
You will need hand rail pillars or split pins and 0.45mm rod for the hand rails. To make the accurate positioning and fitting easier, holes have been slightly indented on the body; they just need drilling out.
Couplings are left for the user to decide based upon preference; just pop in your preferred coupling type. Alternatively ignore that and slot a scale coupling through the rectangular hole in the buffer beam on the body.
For the rear window grills drilling small holes to take 0.3mm brass/nickel silver rod is recommended as printing them thin enough is difficult due to the tolerances of 'thin wires.'
To fit the chassis to the body, the rear simply slots in the body at an angle. The front is fixed via a screw or bolt that taps easily and is all that is needed, a nut can be glued in place inside the Smoke-Box Saddle if desired. This body shell can be fixed to several Ready To Run (RTR) chassis with a little tweaking, alternatively a fixed chassis is also available separately in 00 or P4.
CHASSIS INSTRUCTIONS: Please see the Chassis themselves for more information.
Due to printing tolerance issues the whistles have had to be removed. These can be simply made using a piece of brass rod as a representation. The best option is to buy one from another source.
For wheels, axles, crankpins etc
Alan Gibson is a great resource
www.alangibsonworkshop.com
...as is Markits
http://www.markits.com
For Motors and Gearboxes, High Level are recommended.
http://highlevelkits.co.uk/
TIP:
For the LB&SCR E2, to allow your model to be motorised without having to hack away at the underside of the firebox or boiler as is common with many of kits depending what parts you use, a 'Roadrunner +' Gearbox from High Level will fit nicely, using a drive extender will make things easier too, especially if fitting a fly wheel. These components were used in the research and development trial builds.
For crank pins, hand rail rod/wire and pillars, washers, bearings and other small sundry items Mainly Trains is a good website to visit.
http://www.mainlytrains.co.uk/acatalog/index.html
But of course you can use whatever suits your needs and preference best,
the above has been typed out to hopefully aid you should you be new to kit building. The advantage of these 3D printed kits is 90% of the work is done for you, both on the body and the chassis.
For those of you who like to anthropomorphasize their engines, suitable expressive smoke-box faces are available from Tyne Side Models https://www.shapeways.com/shops/seansstuff?section=Character+Type+1+Faces+-+Size+2&s=0
(A much cheaper versions is available in a high quality resin very similar to FUD/SFDP by emailing sparkshot082@gmail.com printed on a Photon for £48.89 plus postage.)
For White/Black Strong Flexible (WSF/BSF) only. A finer, scrisper and smoother version in Frosted Ultra Detail (FUD)is also available.
Smokebox dart had to be removed yet a turned brass one would be the best option anyway.
The example photograph has been built using this WSF LB&SCR E2 body, the 00 chassis and the brass coupling rods all available from this shop. Motor, wheels, gearbox etc. can be found using the links at the bottom of this page.
This is a 4mm scale model of the London, Brighton & South Coast Railway (LB&SCR) E2 Locomotive with extended tanks.
The main motivation for the creation of the SCC E2's was to correct the errors and compromises made by previous manufacturers; as a result these freshly designed and E2's are not shortened, the running plate curves are not over the top and they have the correct wheelbase.
Spectacle plates have been added as an optional extra. If you don't want them simply cut them off and file smooth - easy.
Please note - the prototype photographs sometimes showed the Smoke-Box to have rivets and other times none at all. For this reason this model has been designed as the smooth type to print better and provide a better canvas. Rivets can be added by buying transfer decals that have physical relief. DCC Concepts is one manufacturer that supplies them.
Also to be noted, the rivets on the side of the tank don't always turn out perfectly in WSF/BSF, especially after sanding down. Adding transfer rivet decals will solve this easily.
BODY INSTRUCTIONS: The Smoke-Box Door is located on a sprue in front of the body and the 2 slide in cab doors are sprued under the cab. These slide in from the top and are removable, the cab roof is provided loose. This allows you to easily paint the interior and add a crew. . The buffers are sprue joined underneath also, this gives you the choice of using them or substituting them with metal ones from other manufacturers without having to hack them off a buffer beam.
If you use the supplied buffers please note that the buffer bases and buffer heads are slightly thicker than they should be due to printing tolerances so filing them back will bring it back to scale length. The round sprues at the rear of the buffers also double as pins to locate to the holes in the buffer beam.
The optional Boiler Injector Pipe is located loose and is usualy to be joined to the left hand side of the locomotive if you are to use it. Refer to prototype photographs.
You will need hand rail pillars or split pins and 0.45mm rod for the hand rails. To make the accurate positioning and fitting easier, holes have been slightly indented on the body; they just need drilling out.
Couplings are left for the user to decide based upon preference; just pop in your preferred coupling type. Alternatively ignore that and slot a scale coupling through the rectangular hole in the buffer beam on the body.
For the rear window grills drilling small holes to take 0.3mm brass/nickel silver rod is recommended as printing them thin enough is difficult due to the tolerances of 'thin wires.'
To fit the chassis to the body, the rear simply slots in the body at an angle. The front is fixed via a screw or bolt that taps easily and is all that is needed, a nut can be glued in place inside the Smoke-Box Saddle if desired. This body shell can be fixed to several Ready To Run (RTR) chassis with a little tweaking, alternatively a fixed chassis is also available separately in 00 or P4.
CHASSIS INSTRUCTIONS: Please see the Chassis themselves for more information.
Due to printing tolerance issues the whistles have had to be removed. These can be simply made using a piece of brass rod as a representation. The best option is to buy one from another source.
For wheels, axles, crankpins etc
Alan Gibson is a great resource
www.alangibsonworkshop.com
...as is Markits
http://www.markits.com
For Motors and Gearboxes, High Level are recommended.
http://highlevelkits.co.uk/
TIP:
For the LB&SCR E2, to allow your model to be motorised without having to hack away at the underside of the firebox or boiler as is common with many of kits depending what parts you use, a 'Roadrunner +' Gearbox from High Level will fit nicely, using a drive extender will make things easier too, especially if fitting a fly wheel. These components were used in the research and development trial builds.
For crank pins, hand rail rod/wire and pillars, washers, bearings and other small sundry items Mainly Trains is a good website to visit.
http://www.mainlytrains.co.uk/acatalog/index.html
But of course you can use whatever suits your needs and preference best,
the above has been typed out to hopefully aid you should you be new to kit building. The advantage of these 3D printed kits is 90% of the work is done for you, both on the body and the chassis.
For those of you who like to anthropomorphasize their engines, suitable expressive smoke-box faces are available from Tyne Side Models https://www.shapeways.com/shops/seansstuff?section=Character+Type+1+Faces+-+Size+2&s=0